To clean a stove

When you're ready to get stuck in with the proper cleaning of your stove, remember to never use wire wool*, scouring pads*, sandpaper, scraper or brasso. Seriously, people have used such things and marred their stoves beyond visual recovery... Brasso is a hidden ill - it seems like the perfect cleaning solution, however it contains ammonia which has been noted to make the particular brass that these stoves are made of susceptible to stress cracking (which is very bad).
*Sometimes, and for certain parts of the stove, you may want to use these, albeit with great care & in a "safe" manner.
Now, with a mild soapy solution/detergent, clean the stove carefully (don't use anything that is too abrasive - you may get away with an old & worn non stick safe scourer, or you may not...). You might have areas of green on the brass (verdigris) which you can either treat with strips of kitchen paper soaked in distilled vinegar or with BarKeepers Friend (follow the instructions!).
You've already cleaned the inside of the tank out if you followed the last post, but if not, go to the last post to find out how you can do it!
Now you can polish the tank up with Begom Alu or Autosol (or similar) and a soft lint free cloth. If you don't want your fingers getting black (and I do mean black) then wear cotton, nitrile or latex gloves when doing this. No it's not kinky, it just stops you looking like a coal miner at work the next day.
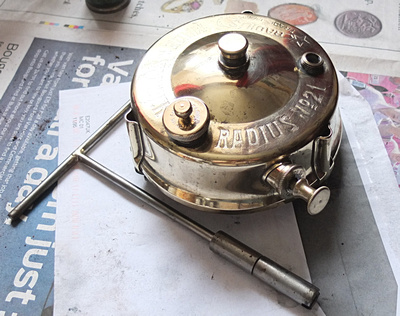

Polished tank with an NRV removal tool in front.
So far so good - after a few hours work, the tank is nice and shiny. What about the burner though? This will be coated in soot and isn't going to be particularly nice to clean...
You are going to need replacement heat-proof washers after following the next step.
Separate the burner assembly from the riser tube and spirit cup. Note the order of disassembly and where the various heat-proof washers are.
 The riser tube will clean nicely as the tank did. The spirit cup may need a little extra work - start to work on the black bits with the previously used non-stick safe scourer and if that doesn't work, use the finest wire wool that can be got (I think it's 000 or 0000). For the burner head I suggest that some work with a scourer (the burner is a harder alloy than the tank so isn't going to scratch as easily) and a weak detergent solution will help get the worst off. Other useful tools here include a small brass wire brush to clean the burner.
You will need a special tool for the next stage.
To clean the inside of the burner, we need a purpose made nipple removal tool (a pointer here - some of the available tools on e-bay may not fit the nipple - don't force it, either file out the tool, or get one from base-camp.co.uk). We need to remove the nipple (keeping it safe) and then either soak the burner in a weak solution of caustic soda to remove the carbon from inside (NOT recommended as it is EVIL stuff!) or we heat the burner (don't do this inside) with a blow torch until the colour changes (don't heat it cherry red!!!) and plunge it into a bucket of cold water. Empty the burner of water and repeat this until the carbon stops coming out of the burner (3 or 4 times usually). Now metal gets HOT when heated! Use mole grips or similar to hold the burner by the "nut" when you do this and maybe wear gloves. When done, blow through from the bottom of the burner (wait until it's cold!) and it should now be clear :)
You will now need to remove the remains of the heat proof washer from the burner (that sits on top of the spirit cup) and off the spirit cup. You may need to use a jewellers screwdriver carefully to assist in removing all traces (without scratching the metal) and ensuring that the "groove" is clear. Be careful as these are sometimes asbestos based. If you are worried, clean the washer off under water with a suitable tool.
You can now warm the burner (if you want) and soak the burner in distilled vinegar for around 15 minutes to help in final cleaning. Rinse off (and through) well with cold water (if you can pump high pressure air or water through the burner to remove any last bits of carbon, do so!) and polish the burner with whatever you're using.
The nipple can now be replaced by a new one or the old one cleaned up and the jet orfice pricked (with the correct pricker) and can be installed in the burner (take care not to cross thread it as this will ruin the burner!). Yes this step is annoying. And time consuming. The easiest way is to use a little blu-tack to hold the nipple in the tool (to stop it falling out) and to turn the nipple antil-clockwise to start with (it helps it "locate") and then tighten it up slowly and carefully...
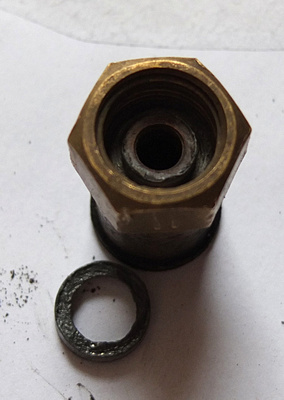
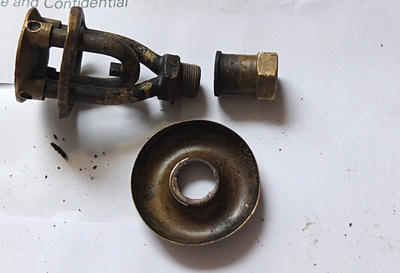
Base of riser tube & lead washer
There is a lead washer in the base of the riser tube (on the part that screws onto the tank) for most stoves. This may need to be removed and replaced. Re-assemble the burner ensuring that there is a heatproof washer above the spirit cup (and sometimes one below - you did make a note of how it came apart?). Tighten up using spanners NOT pliers and ONLY grip the nuts. Don't overtighten.
All well and good! Your stove should be nice & shiny and your burner should be ready for use. But what about the other washers & seals?
The pump washer will probably need replacing. Sefaudi on e-bay does awesome pump washers and he comes HIGHLY recommended.

Please refer to the above photo. You can see the old pump washer in front of the pump shaft and other components. The small nut holds the pump washer on the end and the brass threaded collar holds the pump washer. The large nut screws onto the brass collar and the nut goes inside the pump washer (common sense!). The whole assemble slids onto the narrower bit of the pump shaft with the open end of the washer towards the end (i.e. where the little nut goes). Soak the pump washer in oil for a good long while (overnight, or longer if possible) - remember, not vegetable oil!
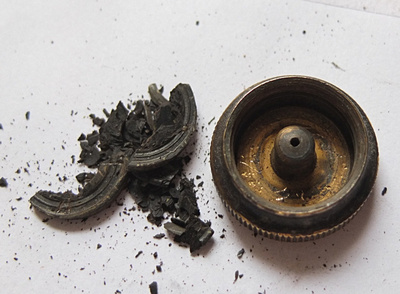
Replace the washer in the fill cap - the old one may need to be broken out using a jewellers screwdriver.
If you get the dreaded "Viagra Effect" when pressurising the tank, the NRV (inside the pump tube) may need to be removed to have the "pip" replaced. There may be a washer in the bottom of the pump tube for the NRV which may need replacing too.
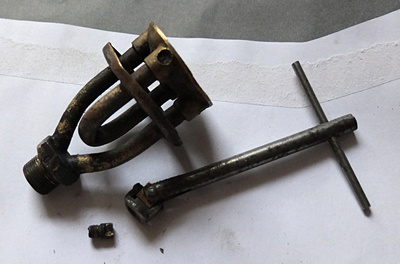
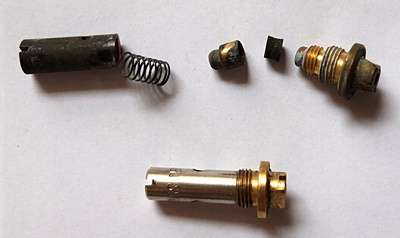 A complete NRV with a disassembled one above. The springs break and weaken and may need replacing. The brass cup holds the pip (which may need to be dug out). Service the NRV and replace.
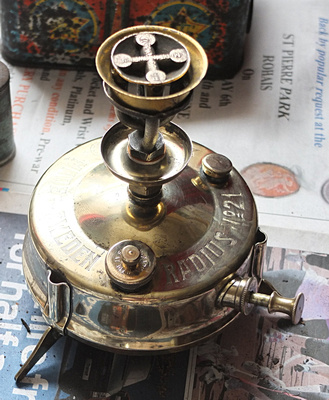
Once all the seals have been replaced and it all cleaned, it should look a bit like this. This is the same stove from the previous post.
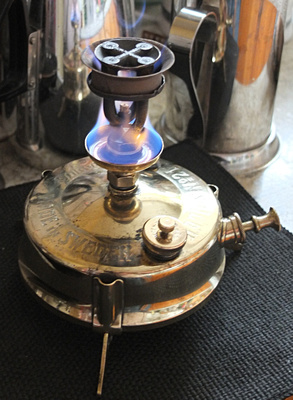
Prime the stove
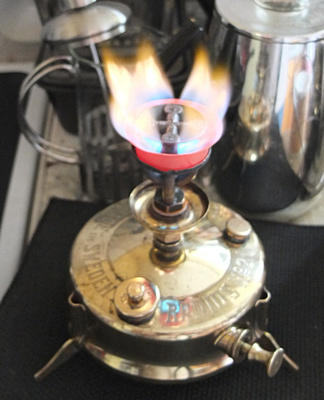
 And add pressure as the meths is almost all burnt off
 If the flame tips are very yellow (or the flame is all to one side of the burner) you will need a new nipple as the old jet is either damaged or too worn.
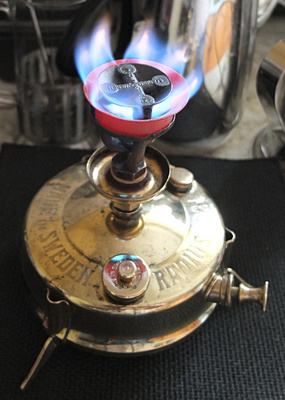 A little yellow in the tips is fine and usually goes away with a pan on top. Now you can add the pan supports and use your stove!